
Weathering Rolling Stock for Realism: Practical Model Train Weathering Techniques That Look Like the Prototype

Weathering Rolling Stock for Realism: Practical Model Train Weathering Techniques That Look Like the Prototype
Clean, glossy freight cars look great in a display case—but on a working railroad, they can make even the best scenery feel “toy-like.” In this beginner-friendly (but detail-rich) guide to weathering model trains, you’ll learn how to turn factory-fresh rolling stock into equipment that looks like it’s earned its miles. We’ll focus on weathering rolling stock the way real railroads age it: sun fade, road grime, brake dust, rust, spills, and patchy repairs, all applied in believable layers.
This matters because rolling stock is constantly in the foreground—passing slowly through yards, sitting in sidings, and being switched right in front of operators. Realistic weathering ties your cars to your layout’s era and purpose, and it instantly improves photography. Better yet, weathering is a skill you can scale: quick and subtle for beginners, or deeply layered for advanced modelers. By the end, you’ll have a clear plan, a set of repeatable model train weathering techniques, and the confidence to weather an entire fleet without every car looking the same.
If you like the “build it up slowly” approach, powder-style weathering can be especially forgiving because you can work from faint to heavier effects; for example, the Tamiya 87079 - Weathering Master A Set - Sand, Light Sand, Mud is well-suited to dusty roofs, light road film, and those tan-to-brown transition tones that show up on many prototypes.
1) Prototype Thinking: Why Freight Cars Weather the Way They Do
Before paint hits plastic, it helps to understand what you’re trying to imitate. Freight cars don’t “rust evenly” and they don’t get dirty in random places. Most weathering patterns come from a few predictable causes:
- Gravity and water flow: Rain carries dirt downward. This creates vertical streaks under roof seams, ladders, ribs, and door tracks.
- Sun and oxidation: Paint fades most on horizontal surfaces (roofs, hoods, top chords) and on the sides facing harsh sun. Fading often shifts color, not just brightness.
- Mechanical wear: Sliding doors polish rails and tracks; grab irons get rubbed; loading areas show scuffs and scrapes.
- Brake dust and track grime: Trucks, wheels, and the lower third of the car collect oily dirt and dark dust kicked up from the right-of-way.
- Commodity stains: Covered hoppers get cement streaks; coal hoppers get spillage and dusty residue; tank cars show vertical spills and discoloration around fittings.
- Maintenance and patching: Cars get repainted in panels, stenciling gets updated, and repairs create “new metal/old paint” contrasts.
A useful rule: weathering is usually heavier at the bottom and on the roof, with the “middle band” showing the car’s base color the most. That single idea keeps realistic freight car weathering believable.
2) Planning Your Weathering Rolling Stock: Era, Car Type, and “Story”
The fastest way to get good results is to decide what you’re modeling before you start. Ask three questions:
- What era? A freshly painted car in its first year looks different than one 15 years into service. Older eras also tended to show more patched repairs and less uniform paint practices.
- What service? Unit-train cars (coal, grain) often show consistent grime patterns. General service boxcars can vary wildly depending on routing and loading.
- What’s this car’s “story”? Is it a new car assigned to a premium customer? A beat-up car relegated to storage? A recently shopped car with new trucks but old sides?
For a fleet, aim for a “weathering roster” mix:
- 10–20% light weathering: newer or shopped cars
- 60–70% medium weathering: typical road cars
- 10–20% heavy weathering: hard-used, older, or special-service cars
This approach makes weathering rolling stock look realistic across the layout because not every car is equally grimy. Real railroads are mixed fleets, and your models should be too.
3) A Beginner Weathering Guide: A Simple, Repeatable Layering Recipe
If you’re new, the key is to build weathering in thin layers. You can always add more, but it’s harder to remove a heavy, opaque mistake. The following sequence works on nearly any freight car.
Step 1: Dull the Shine (The “Scale Finish” Foundation)
Most models start too glossy, and that shine fights every weathering effect. Your first goal is a uniform, low-sheen surface so later layers look like part of the paint, not something sitting on top. A flatter finish also makes powders and washes behave more predictably.
Common mistake: skipping this step and trying to “weather over gloss.” The result often looks blotchy or like dirty fingerprints instead of aged paint.
Step 2: Fade the Base Color (Sun and Age)
Fading is the secret weapon of convincing weathering model trains. Instead of jumping straight to rust and black grime, slightly fade the base color first. On the prototype, paint chalks and lightens, and lettering can look less crisp even when it’s intact.
- Keep fading subtle: you’re aiming for “sun-tired,” not “whitewashed.”
- Fade roofs a bit more than sides.
- Vary the fade panel-to-panel to avoid a uniform “sprayed” look.
Common mistake: fading everything evenly. Real cars have uneven exposure and touch-ups.
Step 3: Add a Chalk Wash for Dirt and Tone (Yes, It’s Useful)
A chalk wash airbrush weathering approach can sound advanced, but the concept is simple: a thin, dusty layer that mutes colors and blends transitions. Even without an airbrush, a light wash can settle into details and reduce contrast.
Prototype reasoning: a lot of “dirt” isn’t thick mud—it’s fine dust that dulls paint and collects around rivets, seams, and ribs.
Tips for better results:
- Work in light passes/layers instead of one heavy coat.
- Keep the effect lighter in the center of car sides; heavier near the bottom.
- Stop and view the model from normal layout distance—weathering can look extreme up close.
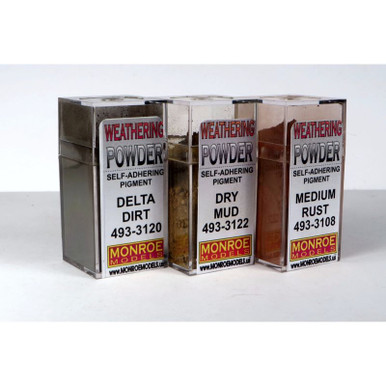
To keep your “dust tone” consistent from car to car, consider using a dedicated powder palette and repeating your sequence; for example, the Monroe Models 493-2914 - Dirt and Rust Weathering Powder Set can help you establish that baseline of dirt, then selectively push certain areas toward warmer rust notes without having to guess at color mixes.
Step 4: Targeted Grime and Streaking (Where the Dirt Actually Goes)
Now you can place dirt with intention. Focus on:
- Vertical streaks: under roof edges, seams, and ladders
- Door tracks: grime lines where sliding doors run
- Lower third: road dust and oily splash
- Ends: more grime around ladders, brake gear, and coupler areas
Common mistake: streaking every panel with the same width and length. Real streaks vary. Some are faint, some bold, some interrupted by ribs or patches.
Step 5: Trucks, Wheels, and Underframe (The “Instant Realism” Zone)
If you only weather one area, do the trucks and wheels. They’re almost never clean on the prototype. A believable mix includes:
- Dark brown/gray road grime on sideframes
- Darker tones near journal areas and springs
- Dusty highlights on edges and raised details
Prototype reasoning: dust sticks to oily surfaces and builds up. Also, the underframe is a magnet for grime kicked up from ballast and track.
4) Advancing Your Model Train Weathering Techniques: Rust, Repairs, and Commodity Stains
Once you’re comfortable with basic fading and grime, you can add “character” effects. This is where weathering rolling stock becomes specific to the car type.
Rust: Less Than You Think, and Not Everywhere
Many models are over-rusted. On the prototype, rust often starts where paint fails: edges, seams, roof panels, around hardware, and spots where water sits. It also shows up where the car is damaged or scraped.
- Good rust locations: roof seams, lower door edges, end platforms, ladder bases, around bolt heads
- Use color variation: fresh rust can be brighter; older rust turns darker and duller
- Keep it scale-thin: heavy rust should still look like staining, not thick paint blobs
Common mistake: painting rust in big, round patches centered on panels. Real corrosion usually follows seams, edges, and damage lines.
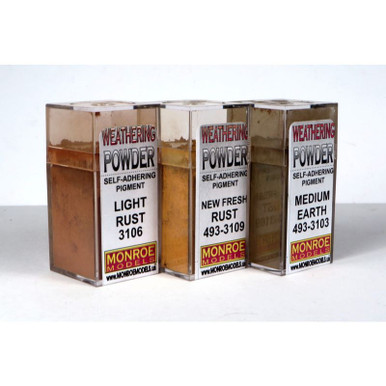
For those “just enough” rust accents—especially around hardware and seam lines—consider using the Monroe Models 493-2911 - Rust and Dust Weathering Powder Set to vary tones between fresh orange-brown and older, duller rust while still keeping the effect thin and in-scale.
Patches and Re-Stenciling: The “Railroad Did Work Here” Look
Freight cars are maintained. Panels get replaced, reporting marks get updated, and ownership changes can leave evidence. Even if you don’t model specific repaint programs, you can still capture the feel:
- Create subtle panel contrast: one section slightly darker or fresher than the rest.
- Place patches where they make sense: near doors, lower side sheets, and ends that take abuse.
- Blend the edges with light dusting so the patch doesn’t look like a sticker.
Prototype reasoning: repairs are functional. Railroads don’t repaint whole cars for small work if the car is due for heavier shopping later.
Commodity-Specific Stains (Make Cars Match Their Job)
For realistic freight car weathering, the cargo tells you where the mess will be:
- Covered hoppers: pale streaks below hatches and along slope sheets; dusty roofs
- Coal hoppers/gondolas: dark residue inside, spill marks along top chord, dusty black film on sides
- Tank cars: vertical spill streaks from domes and valves; subtle discoloration around fittings; road grime heavy at the bottom
- Boxcars: door track grime, scuffs near doors, rust at lower edges and corner seams
Common mistake: applying the same weathering “recipe” to every car. The fastest way to level up is to tailor effects to the car’s service.
5) Airbrush vs. Hand Methods: Choosing the Right Tool for the Job
You can get excellent results with or without an airbrush. The real choice is about control and repeatability.
When Airbrush Weathering Shines
Airbrush weathering excels at:
- Soft, even fading
- Thin grime layers on the lower third
- Blending multiple effects together
A good way to think about it: the airbrush creates “atmosphere”—dust, haze, and distance effects that unify a model.
When Hand Techniques Are Better
Hand methods are great for:
- Pinpoint rust spots and scratches
- Streaking under specific details
- Localized spills and damage
Many modelers combine both: airbrush for the big, subtle layers, and hand work for the storytelling details. That combination is a classic path in weathering model trains because it mirrors the prototype: general grime everywhere, plus specific events in specific spots.
6) Common Mistakes to Avoid (and How to Fix Them)
- Over-weathering everything: Fix by adding lightly weathered cars to your fleet and reserving heavy effects for a few “veterans.”
- One-color dirt: Real grime has variation—cool grays, warm browns, and near-black oils. Fix by using layered tones instead of a single dark pass.
- Ignoring the roof: Roofs often show the most sun fade and staining. Fix by adding subtle fading and streaking first, then blending.
- Perfect symmetry: Nature isn’t mirrored. Fix by varying streak lengths, patch placement, and intensity side-to-side.
- Weathering that hides lettering completely: On many prototypes, lettering remains readable even on dirty cars. Fix by backing off the heaviest layers around reporting marks and reapplying lighter, dusty tones.
7) Practice Plan: Weather a Small Fleet Without Getting Stuck
If you want to build skill quickly, don’t weather one car for three weeks. Weather three to five cars in a batch using the same steps. This keeps your mixes consistent and helps you learn what each layer does.
- Pick cars that would logically have similar grime (for example, general-service cars from the same era).
- Apply the same fade approach to all, then vary intensity slightly.
- Add lower-third grime next, then individual streaks and details.
- Finish with trucks and underframes on all of them.
- Do one “hero car” last with extra patches, rust, and commodity effects.
This batch method is especially effective for weathering rolling stock because it produces a fleet that looks like it belongs together—without looking identical.
Estimated word count: ~1,250 words.
Recent Posts
-
Weighting Freight Cars for Better Performance: NMRA Standards, Practical Methods, and Tracking Tips
Weighting Freight Cars for Better Performance: NMRA Standards, Practical Methods, and Tracking Tips
-

Metal vs Plastic Wheelsets: Pros, Cons, and How to Choose the Right Upgrade for Your Model Railroad
Metal vs Plastic Wheelsets: Pros, Cons, and How to Choose the Right Upgrade for Your Model Railroad
-

Weathering Rolling Stock for Realism: Practical Model Train Weathering Techniques That Look Like the Prototype
Weathering Rolling Stock for Realism: Practical Model Train Weathering Techniques That Look Like the